Thoughts I Haven’t Thought Yet

thinker-300x224

This time of year, you seem to see posts about busyness on all the church tech blogs.  It always strikes me how crazy this time of year can get.  I am pretty fortunate to be in a situation where we don’t do a major Christmas production.  I may not be as busy as some, but I still seem to be busier this month than any other.

In our church, it seems like there are more videos, more rehearsals, more stuff than normal.  We have basically doubled our average in-house video production, and each video seems to be a bit more complicated than the last.

On top of that, we have Christmas Eve services, and all our regular Sundays.  You may be looking at this and saying, “you really have no idea.”  And that is probably a true statement.  So instead of telling you how to handle your Christmas rush, I will instead share a few thoughts I wish I had thought of at least a month ago…

  1. Scheduled Time To Schedule:  This month, I really needed to sit down before I started and looked closer at my schedule.  Some scheduling issues were above my pay grade, and therefore out of my control.  But I should have had more input into the things I could control.  This week I had a school Christmas concert Tuesday night, rehearsal for Sunday on Wednesday night, rehearsal for the Christmas Eve worship band on Thursday night, and rehearsal for a jazz band for Christmas Eve pre-service music on Sunday night.  Add that to the personal Christmas time plans, and other random time obligations, and there are simply not enough nights in the week.
  2. Don’t Forget Family:  Last week I was talking to my wife about my schedule .  Her comment was, “I really won’t see you at all this week, will I?”  That question struck me like a punch in the gut.  I have a three month old baby at home, and the week before her first Christmas I will spend more time at work than everywhere else combined.  I definitely need to prevent this from happening again next year.  Fortunately, this year it happens that I have a little time off after Christmas.  I don’t think that makes up for my schedule this week, but at least it is something.
  3. Think Through Stage Needs: This probably could have gone under the scheduling thought, but I will share it separately.  One thing I did not think about until much too late is all the times I have had to, and will have to change my stage.  Last week on Friday we had a movie night in our auditorium.  We rented a large screen and projector and set them up on the stage.  It was a great night, but it required me to set-up my stage for rehearsal on Wednesday, tear it down Thursday for the screen, and set it back up Friday after the movie night.  Then Sunday afternoon I had to tear the stage down again for a school Christmas concert and rehearsal on Monday and Tuesday.  Set it back up for Wednesday rehearsal, change it for the Thursday Christmas Eve rehearsal, change it back for Sunday, change again for Christmas Eve, then back to the regular Sunday setup again.  Last month, I should have planned this out better to limit the number of times I have to change the stage, or at least find ways to minimize the differences.
  4. Contingency Plans For Contingency Plans:  I am fortunate that I don’t have to rent equipment for our Christmas season.  However, the month does tax my contingency plans.  Typically speaking, I have a few wired mics, if a wireless mic or two are not working.  I also have a spare wireless handheld mic to use in emergencies.  I also usually have at least one spare D.I. box.  But Christmas Eve, all of those extras will be in use.  So what happens if something fails?  This month I need a backup plan for my backup plan, because my backup plan is becoming my main plan.  And of course, I should have thought this through sometime before a week till Christmas Eve.
  5. Test Early, Test Often: There are a few pieces of equipment that I only get out of the closet once or twice a year.  One example of that are my orchestra mics.  I have a set of mics for orchestra instruments, leftover from a bygone era.  I get the opportunity to play with a couple of these mics each Christmas.  But of course, I don’t think about testing them until the week before Christmas.  Far too late to do anything if one of them isn’t working.  Another testing failure for me this year was a couple of snow machines.  This year the pastoral team asked if we could make it snow on stage on Christmas Eve.  We have a couple of old snow machines that have been in the church longer than anyone on our staff tech team.  This time, I did manage to follow the “test early” concept, and I had tested both snow machines, found clogged pumps, and repaired them in early November (go me!).  What I failed to do was test them again until last week.  One of the snow machines is still working great, the other is dead.  I again took apart the pump, but could not get it to work again.  So we have had to settle with only one snow machine.  The effect on stage is still nice, but we do not have the even coverage we had with two machines.  If I had tested the snow machines again before it was too late, I could have ordered a new pump and had them both up and running for Christmas Eve.
  6. Remember To Stop and Remember:  There is a reason this is such a busy time on the church calendar, and our personal calendars.  It is not just because of the cookies and carols.  We are celebrating the birth of a life that changed the world.  It is far to easy to lose sight of the reason in the midst of this season.  I must do a better job of stopping and remembering why we do all this, or it all becomes meaningless.

I am sure that there are other thoughts I haven’t even realized I should have thought yet.  Hopefully next year I can look at this list earlier and not put everything off to the last minute.

Limiting Stage Volume

In my previous post about volume limits, one of the keys I mentioned was limiting stage volume.  I mentioned I could write an entire post on this topic alone, so here it is…

If you think of the average contemporary church stage, there are quite a few sources of volume.  Drum sets and guitar amps are normally the most obvious offenders, but floor monitors can be just as dangerous.  For this post, we will focus on the different contributors to stage volume, and different strategies to limiting them.

Drums:

This in many churches is the loudest source of stage volume.  Often loud drum sets will dictate volume levels more than any leadership mandates could.  I have been in situations before where we did not mic the drums, and mixed the rest of the instruments to the live drum volume.  I am not recommending this practice, but it gives you an idea of the challenge we face.

The most obvious solution to the drum volume problem is electronic drum sets.  However, whether this is a true solution or not is debatable.  They do reduce stage volume, but unless you splurge to buy a high end electronic kit, you will never be happy with the drum sound, and even with top of the line kits it is difficult.

The second option is sound limiting techniques.  Drum shields and padding are often use to reduce or redirect live drum sound.  Some churches even go so far as building a full cage for the drum set.  Although a full cage is not in the budget of most churches, some level of sound redirection is very helpful.  Just make sure you are not making the problem worse instead of better.  I visited a local church this summer who was having problems with their music mix.  As soon as I walked in the room, I knew what the problem was.  They had built a drum cage out of plexiglass and styrofoam.  I am sure budget issues limited what they could do, but their DIY drum cage definitely hurt, rather than helped.  The natural tendency of a drummer in a cage is to play louder.  Put them in a cage with little or no sound deadening, and you are magnifying the problem, not reducing it.  A good quality shield in front of the drum set would be much more effective.

Another thing to consider with a drum shield is where the sound is being redirected.  Typically, a drum shield will reflect sound up, and against the back wall.  So if you are reflecting this drum sound onto hard surfaces, such as walls and a low ceiling, you are probably doing more harm than good.  Consider adding some baffling behind the drum set, against the wall, or above the shield, or both.

Finally, and most importantly, work with your drummer.  Most drummers simply want to make the band sound better.  So if you talk to them in a polite way, and work together, they can help reduce stage volume.  Talk to them about how lowering their volume on stage will make the sound in the house better.  This step should be the first and most obvious solution.

Amplifiers:

Again, key number one is working together with musicians to lower stage volume.  This can become a complicated issue for many reasons.  One factor is that any many churches, guitarists and bass players typically prefer to hear themselves through the amp, rather than a monitor.  So reducing the amp volume reduces their ability to hear themselves.  To solve this problem, try placing the amp in front of the player, and point it at their head instead of their knees.

Another issue with guitar amps is that volume level effects tone quality.  Many guitarists intentionally run their amp louder to get the tone they are looking for.  So asking them to reduce their amp volume on stage is like asking them to play with bad tone.  So the solution is trying to find a way to reduce stage volume without turning down guitar amps.  Again, pointing them towards the back wall may help, but probably not enough.  If the amp is on stage, baffling it may help.  The other solution is to move the amps off stage.  Many guitarists cringe at taking their amp and hiding it in the closet.  They don’t want to loose the ability to adjust the amp.  But when the choice is between turning down the amp, or moving it off stage, most guitarists I have worked with will choose the later.  Just make sure they get a good sound in the monitors, or no one will be happy.

Monitors:

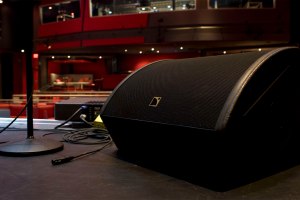
One contributor to stage volume that often gets over looked are floor wedges.  If you have multiple floor monitors on stage, you have a cascading problem.  The wedges have to be turned up to overcome the other loud volume sources on stage.  Then with the wedges blaring, there is no clarity in the mix, so people start asking for more of everything in their mix.  This just compounds the problem.

The most obvious (and expensive) solution is replacing wedges with in-ear monitors.  This is definitely a great option, but out of the budget of many churches.  And sometimes you will find that a cheap in-ear solution does more harm than good.

Another potential solution is how you set-up and mix floor wedges.  One important thing is to have the musician or singer as close to the wedge as possible.  That way, you can lower the overall volume level of the wedge, and the musician can still hear.  Another key to reducing wedge volume is to mix monitors by subtraction rather than by addition.  They most natural way to mix monitors is to add a little of this, and a little of that.  More often than not, that is how musicians will request changes.  However, the more you add, the louder it gets.  Rather, if a musician needs more of several items, try reducing the other channels instead.  Also, training musicians to ask for channels to be reduced rather than increased will help as well.

Following these guidelines can help reduce stage volume, which can bring a lot of clarity to the house mix.  But please let me reiterate, the key is to work with musicians, not against them.  If the volume struggle becomes an us vs. them battle, nothing will help.  I hope these suggestions help you control your stage volume and make your mixing better, and more fun.

Mixing Within Decibel Limits

TheDailyDecibel_Logo_2010c

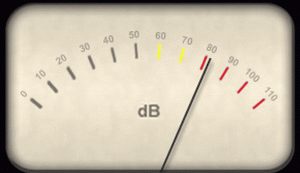
I have been trying to write this post on and off for almost two weeks now, and have been continuously disappointed with the direction I wind up going.  I keep finding myself caught up in the “should there be decibel limits” conversation, or “what is appropriate decibel limits”, or “how to set decibel limits.”  But I am not in a situation where any of those conversations are necessarily relevant.  They are all things that should be discussed, but in my case, the discussions have already been had and the decisions have already been made.  So, instead of writing about what “should” be or “could” be, I want to focus on how to create the best sounding mix within decibel limits.  I can cover the should’s and could’s in another post if anyone is interested.  Let me know in a comment or through the contact page.

Like many churches I have heard of, my church leadership has put decibel limits in place to create consistency, and try to create a positive worship environment for as much of our congregation as possible.  I personally wish the level was a little louder (actually personally, I wish it was a lot louder, but I know that is not what is best for our church).

But the limit is what it is, and my job is to create the best mix within that limit.  How do I do that?  I live by these simple rules:

  1. Know and respect the limits: Whether you agree with the limits that have been set or not, they were set intentionally.  Respectful and honest conversations about limits are great, but remember, at the end of the day, the final decision is not ours.  Our job is to respect and obey.  So know your limits, remember them constantly while you mix, and respect them.
  2. Get a good decibel meter:  Without a calibrated decibel meter, specific decibel limits are meaningless.  So make sure you have and use a good decibel meter.  Also, understand how your meter works.  Make sure you use the correct settings to get the measurements you want.  Know what weighting and range settings to use in your environment, and use them consistently.
  3. Understand hearing safety: You must know how the OSHA safety standards relate to your specific decibel limit.  Often noise complaints will include concerns over hearing safety.  Being able to address those concerns with your specific decibel limits and OSHA standards will assuage safety concerns (and reveal the preference concerns that underly the safety complaints).
  4. Know your room: Walk your room with your decibel meter.  I do this while playing pink noise through the system.  This will give you a steady reference, so you can find any hot or cold spots in the room.  For example, the main entrance of our worship auditorium is a hot spot, and is about 2 decibels louder than anywhere else in the room.  Knowing this, I can walk this area during sound check to make sure things don’t get too out of hand.  Discuss your findings with your church leadership.  Perhaps in the future they might be able to address problem areas, but that is more of a long term solution.  In the meantime, ask anyone complaining about volume levels where they sit.  If they are in a hot zone, a new seat may solve the problem.

(Wow…. 4 points about mixing within decibel limits, and we haven’t even mentioned mixing yet… I am doing well aren’t I?  But really…. how do I mix within decibel limits?)

  1. Always use your decibel meter: This may seem obvious, but make sure you pay close attention to your decibel meter during rehearsal and sound check.  Nothing is worse than dialing in a great mix, then looking down at your dB meter, and realizing you are too loud.  I have my meter on from the first moment of sound check.  And I am constantly monitoring my levels even while setting up everything else.
  2. Beware vocal spikes: In my situation, in my room, it seems like the biggest problem I have are with vocal peaks.  Typically they happen when singers jump octaves, or during loud portions of the song.  One thing that really helps this is properly setting vocal compressors.  Even then, I often have moments where the vocal will peak 5 dBs.  The saving grace is that with good singers the peaks are normally in the same places. If you pay attention, you can anticipate when these peaks are coming, and adjust accordingly.  I note these peaks on my cheat sheet to ensure I don’t miss them.  (Look for a post in the near future about how I setup my cheat sheets).
  3. Limit stage volume: One of the biggest factors in a muddy mix is too much stage volume.  When I first stepped into my current role, I muted the house speakers, and I was measuring about 75-80 db at the sound board, with just stage volume.  If you are trying to create a great mix within difficult decibel limits, reducing stage noise can make the battle much easier, and the results much better.  I can write an entire post just on this topic (and I hope to in the near future), but for now, I will mention a couple of things: Work with musicians to turn down amp volumes, work with drummers on dynamics, and consider drum shields or cages.
  4. Watch the balance: Turning down the volume is not as simple as lowering the master fader.  Changing the overall volume level will change the low to high balance.  So, instead of limiting volume with the master fader, I always use my VCAs (or groups, if that is what you use).
  5. Grouping is your friend: On my board, I use VCAs, but find a way to group similar channels together.  I run all my drum mics through one VCA, so I can adjust the overall drum mix, without messing up the balance of the individual pieces.  I do the same with background vocals.  How many VCAs or groups you have really dictates what you can do with them.  I can share my setup if it is helpful, but I have 8 VCAs, so I don’t know how helpful that might be.  Let me know.
  6. Less is more: When working within volume limits, it is especially important to mix by subtraction rather than addition.  If you want to highlight a particular instrument, often you can get the same effect by lowering another sound or two.  That way, you can still mix with style, taste, and interest, but stay below your decibel limit.
  7. Don’t loose the energy: When limiting volume, the hardest thing to maintain is energy.  Softer sounds naturally sound like they have less energy.  When I need more energy, I always look for a driving sound.  Sometimes that is the kick drum, sometimes bass, sometimes rhythm guitar.  You just need to find a sound that is pushing the song forward, and give it a little more prominence.
  8. Know what is peaking your meter: Most decibel meters will tell you the volume of the loudest frequency at the mic.  So, it is imperative to know what is peaking your meter.  If you are passing your volume limit, you need to know what to turn down, so listening is just as important as watching.  If your lead vocal is peaking the meter, dropping the volume of the rest of the band might get you below the magic number, but it won’t sound good.  Know what is peaking your meter, and how to make it work.
  9. Carve your EQ: Rather than boosting volume on vocals and other items you need to hear clearly, make room for them using EQ.  For example, I typically create a boost around 1khz in the lead vocal, I will then carve out that space by making a 1 khz cut for other instruments.  I do the same thing for my piano at about 2 khz.  Generally speaking, each instrument should have it’s own sonic space.  This will allow you to hear everything more clearly without having to crank the volume.

I hope you have found these basic tips helpful.  Sorry this post got so long… Just kept thinking of more things.  If you have any thoughts, comments, or questions, please feel free to share them.

Happy mixing,

Aaron

Mixing Silence In The Dark

blackout

As I mentioned in my last post, this past Sunday we lost all power during our service.  It was the nightmare of every tech person I know.  Right after the second verse of the second song, we lost everything.

In all actuality, if we had planned the power outage, it could not have happened at a better time.  Our first song was relatively new to the congregation, and there is no way they could have continued singing that without the words.  Our second song was a new version of the old hymn, It Is Well.  The congregation went straight into the chorus as if nothing had ever happened.  It was a really powerful moment.  At the end of the song, our preacher came up and began his message without power.

One thing about our room, we have two giant walls of windows along the side walls of the room, but we have shades that we typically close during the service to darken the room and create a more intimate environment.  Of course, when the power shut off, the blinds were closed, and we had no way to open them up.  Needless to say, the room was very dark.

The power came back on about 5 minutes into the sermon, for just long enough to almost complete the power up procedures for the tech equipment before going out again.  After another 5 minutes of darkness the power came back on for good.

A few lessons to share from all the excitement:

  1. Go With The Flow: There are certain things you can’t really plan for.  I am sure we have some sort of power outage plan, but there is no way it could cover all the potential issues that might come up.  And it is good to have a plan, but in the heat of the moment, we just have to keep our cool and do what we can to make the service work.  Because we kept our heads, we thought to open the shades as soon as the power came back on.  This gave us natural light in the room while we waited for the lighting console to come back up, and prevented us from going back to complete darkness when we lost power a second time.
  2. Test Your Backup Systems: When the power goes off during a service is a bad time to discover that your battery backup for your console is not working properly.  For us, it should be set up to give us enough time to save our show file, and properly shut down the console.  It wasn’t.  I lost power to the console as soon as the lights went out. My digital console automatically powers up exactly how it was shut down, so when we fired the console up during the un-amplified sermon, every band channel was un-muted and turned up.  That created a rather loud pop that startled both the congregation and preacher.  Also, the loop track we use for worship started playing through the speakers immediately after the pop.  As the console continued the power-up procedures I muted everything, which saved me from any more loud noises when we lost power a second time.
  3. Communication is Key:  When the lights went out, the rest of the service became a series of audibles.  We were not quite Payton Manning efficient, but we did play better than Eli.  The original schedule had another song, communion, and offering before the sermon.  So when the preacher stepped up at the end of It Is Well, the rest of the team had to reschedule the rest of the service.  We wrote out the new service flow, and made sure everyone on the tech team had a copy, but we don’t have a dedicated confidence monitor to communicate with the speaker on stage, and we had no way of commuting with the ushers, who were sitting throughout the congregation with their families.  At the end of the sermon, our worship leader went up on stage a little early to communicate to the speaker that he would take over.  After the sermon prayer, the first words from the worship leader were, “as we prepare for communion…” which got the ushers moving.  It was a little clunky, but considering everything, it was a pretty smooth transition.  After communion and offering, our worship leader said, “as we sing this last song….” which communicated the new flow to the speaker, who got up to give the commission at the end of the service.  What made it all work was communication.  It took us a few minutes to figure out how to communicate the service flow to everyone, but it all worked out pretty well.
  4. It Is All in God’s Hands: From a purely technical standpoint, the service was a disaster.  We recovered well, which is the most important part, but we sure did not live up to our vision of creating a distraction free worship experience.  But, despite the problems, God crafted an amazing experience.  He showed up in a powerful way, and we experienced an incredible time of congregational worship.  It is a nice reminder that while our jobs and our tech ministry are important, at the end of the day, we are not necessary.  Even when everything goes wrong (or maybe because everything goes wrong?), God shows up and does something amazing.  That should take some pressure off of our shoulders.

I hope you don’t have an experience like we had Sunday, but if you do, I pray that God takes over.  Let’s use this as a reminder of what our true place should be.  Serving Him and His Church.

Happy Mixing,

Aaron

Mixing Monitors

Floor wedge

A good monitor mix can make the difference between doubt and confidence, good and great, happy and frustrated musicians.  It is not simply a matter of what they hear, but how that affects the music.  Having a good monitor mix can make all the difference in the world.

But all too often the responsibility for that mix is placed only on the musician.  They tell us what they want and we give it to them, whether it is really what they want or not.  Often without stopping to think about what they are really asking for.

For this post, I am going to start by listing some signs that may indicate a poor monitor mix and then talk about how I set them.  Often times, the signs of a poor mix are not the fault of the musician.  Sometimes, things are just off, and it is hard to put a finger on exactly what the problem is.  These symptoms may be a sign of a poor monitor mix.:

  1. Constantly asking for changes.  (Often even contradictory changes)
  2. Continuously asking for more of different channels.
  3. Poor musicianship.  (Singing/playing off key, poor timing, etc.)
  4. General frustration or apathy about the monitor mix.

If your musicians are showing any of these symptoms, they may be struggling with their monitor mix.  (They may also just be having a bad day, so tread lightly).

Here are my basic keys for mixing monitors.

  1. Know My Musicians:  Generally speaking, I have a pretty good idea of what my regular musicians like to hear in their monitors.  If it is significantly different than others, I try to have it set up before they walk in the door.  That way I know what they prefer before they every ask for anything.  I also know what they mean when they say they need a little of something.  Sometimes a little more of something means they want a very subtle bump, sometimes it means more.  Knowing what each individual is actually asking for really helps.
  2. Listen to the Mix: Soloing a monitor send can really help you hear what the musician hears, if your console has this ability.  I even know of engineers who keep an extra floor wedge at the console, so they can hear what the musicians hear.  I have mostly IEMs on my stage, so I just use my headphones.  It is not exactly the same, but it gives me a good idea of what they hear.  Also, if someone is really struggling, it often helps to plug into their in-ear pack.  I have found that clipping and limiters can ruin a mix that sounds good at the console.
  3. Beware of the Mores: Often times a musician who can’t hear something in the mix will ask for a little more of it.  If they are struggling with a bad mix, this can often turn into asking for more of a lot of things, sometimes all at once, sometimes one or two at a time.  Eventually the mix gets to the point where everything is so loud there is no clarity in anything.  Before it gets to this point, I try to bring down the individual sends.  For example, if the drummer is saying he needs more of the entire kit, and most of his sends are pretty high, you get the same outcome by turning down everything except what he wants turned up.  Just make sure to keep the basic mix the same.  If done right, this should bring down the overall volume slightly without impacting the balance, but most importantly, should bring clarity to the mix.
  4. Know What They Need: Many musicians know exactly what they want, but some don’t know what they need.  Usually, it is best to give the musician what they want (within reason).  At bare minimum, musicians need themselves, the leader’s instrument and vocal, a time source (usually kick/snare/click), and any instrument that they need to blend with  (for example, it is a good idea for the lead guitar and keys to be able to hear each other so they don’t step on what the other is playing.)  The same basic needs apply to background vocals, except they need a key reference as well (and if they are on a wedge, they probably have enough natural drum noise without it cluttering the monitor mix.  Many musicians want more than these minimums, and give it to them if they ask.  But if they are struggling with a bad mix, start with the basics and add from there.
  5. Focus on Clarity: When the mix is bad and the musician can’t pinpoint the problem, I will ask if I can listen to the mix during the next song and adjust it.  Often times when I hear what they hear, it sounds a lot like mud.  So I make subtle adjustments to bring clarity.  Sometimes that is EQ changes, sometimes it is bringing down unnecessary extras.  The key is to simplify without losing the basics.  Make sure you make the adjustments in the first half of the song, so they can hear it for the second half.  Then ask how it sounded, and make any additional adjustments as needed.
  6. Communicate Well: By this I do not just mean clearly communicating what you are trying to say.  I mean communicate in a positive and encouraging way.  It is far too easy for a musician to settle for a bad mix, especially when we do not make them feel comfortable when asking for adjustments.  I try to always make the band feel safe to ask for changes.  At the end of every sound check, I tell them to let me know what they need.  I never give anyone a hard time for asking for something.  And sometime during rehearsal I normally ask again if everyone is happy with their monitors.  These simple things show the band that I care about them and want to make sure they have what they need.  I never want them to feel that adjusting the monitors is an inconvenience, even when it is.

Using these basic keys helps me create good monitor mixes.  And this gives the band the confidence needed to play their best.  As the old saying goes, “Good in – Good Out.”  When you give your musicians good monitor mixes, you get better inputs, and therefore a better mix.  So make sure they have what they need.

As always, if you have any thoughts or questions please feel free to add them in the comments section below.

Happy Mixing,

Aaron